I’ve been looking for a way to control a standard AC ceiling fan for some time. I use Z-Wave products for my lighting control and unfortunately there are no Z-Wave fan controllers that I know of. The main prerequisite is that the fan speed can be controlled from a wall plate independent of Home Assistant this will make sure that like the lights the fans would still be operational in the event Home Assistant crashes. In this blog I will show you how I achieved this goal with a little modification to the code and recompile of the firmware.
We need to change the way the relays are switched from the default way
- Slow (1) – relay 1 on 2 & 3 off
- Medium (2) relay 1 & 2 on 3 off
- Fast (3) relay 3 on 1 & 2 off
This behaviour does not give the correct speed control. To get the correct speed control we need the relays to switch as follows.
- Slow (1) – relay 1 on 2 & 3 off
- Medium (2) relay 2 on 1 & 3 off
- Fast (3) relay 3 on 1 & 2 off
Another important feature we want to implement is that when you turn on the fan from the slow or medium speeds the hi speed relay is engaged briefly before switching to the speed that was selected. This is done to give the fan maximum power to get moving, this will save the inrush current from going through the capacitors and increase their life.
We will use a custom template to enable GPIO 3 to function as an input to control the fan speed from a wall plate with a momentary push button that will cycle through the fan speeds 1 step at a time from OFF to LOW to MED to HI and back to OFF with each button press. This process will disable the 433MHz remote which I don’t like anyway.
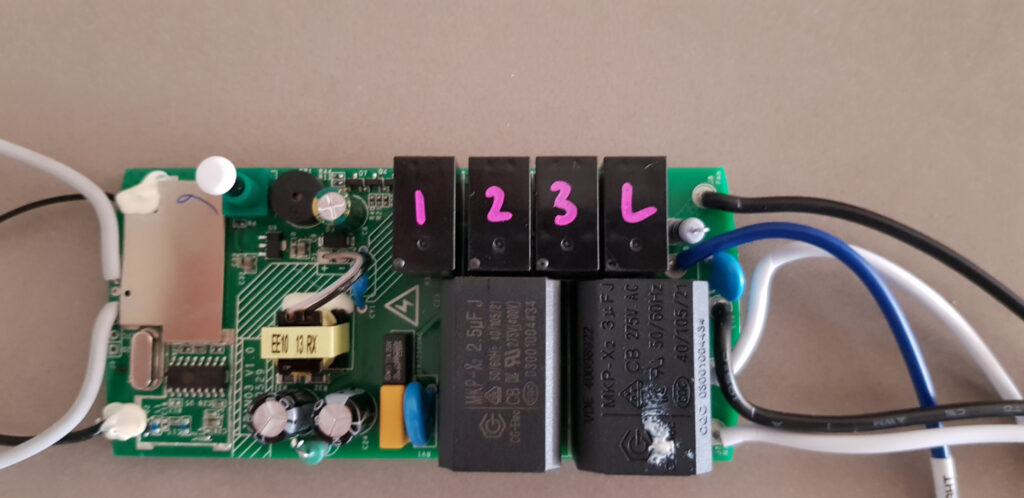
Lets start by editing the xdrv_22_sonoff_ifan.ino which hold the configuration for the Sonoff iFan03.
The below changes will change the medium speed from bringing in relay 1 and 2 together to just relay 2.
Edit line 30 from
const uint8_t kIFan03Speed[MAX_FAN_SPEED +2] = { 0x00, 0x01, 0x03, 0x04, 0x05, 0x06 };
to
const uint8_t kIFan03Speed[MAX_FAN_SPEED +2] = { 0x00, 0x01, 0x02, 0x04, 0x05, 0x06 };
Now we need to change the code that controls the start sequence so that the fan starts on high speed for 10 seconds then changes to the selected speed.
Edit line 31 from
const uint8_t kIFan03Sequence[MAX_FAN_SPEED][MAX_FAN_SPEED] = {{0, 2, 2, 2}, {0, 1, 2, 4}, {1, 1, 2, 5}, {4, 4, 5, 3}};
to
const uint8_t kIFan03Sequence[MAX_FAN_SPEED][MAX_FAN_SPEED] = {{0, 4, 5, 3}, {0, 1, 2, 3}, {0, 1, 2, 3}, {0, 4, 5, 3}};
I used Visual Studio Code to edit and compile the firmware. I run in on Linux and Windows so you should have no problems running the software, it’s free to download and use.

Now if you can’t be bothered editing and recompiling the firmware you can download a ready to go binary from my github here and upload it to your Sonoff iFan03 and follow the instructions below. I have also raised a pull request against the Tasmota repo to get these changes committed to the main development branch. You can track the pull request and comment here.
Once the controller has rebooted click on configure and then configure other and enter the following template, tick activate box and then save. The device will reboot.
{"NAME":"Sonoff iFan03","GPIO":[32,3200,0,34,0,0,256,512,226,320,225,227,0,0],"FLAG":0,"BASE":71}
Once the controller has rebooted, we need to create a rule that will cycle through the fan speeds 1 step at a time from off too Low to MED to HI and back to off with each button press. To do this go the controllers web config page and click on the console button the enter the bellow rule and press enter.
rule1 on button3#state do FanSpeed + endon
Now to enable the rule run the bellow command in the console and press enter.
Rule1 1
If you want the light and fan to be off when you power up the controller, run the below command in the console and press enter.
PowerOnState 0
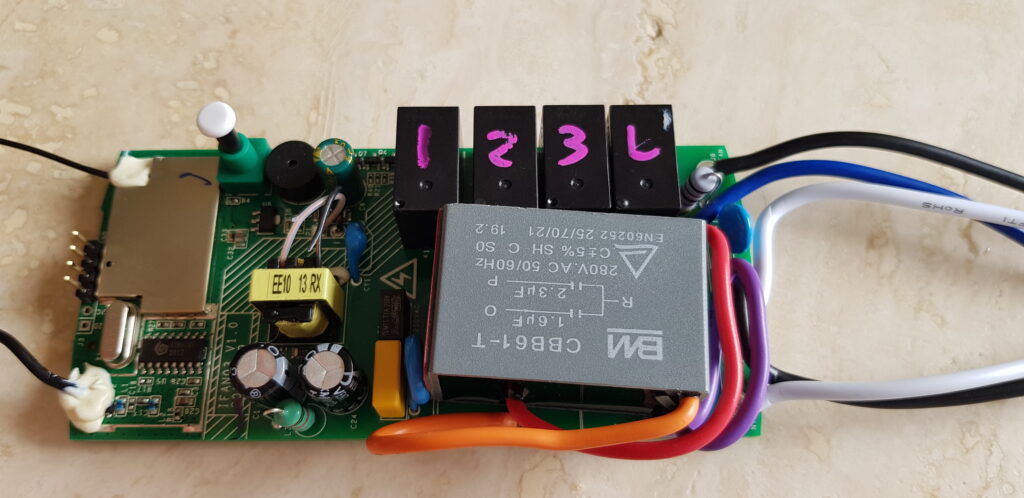
Now all that’s left to do is replace the capacitors for the correct values that give you the desired speed steeps and solder wires to the ground an RX pin headers for the push button. In Australia with 240V mains power I used the following values for the capacitors, low speed 1.5uF and medium 2.2uF. These values give good steps between the speeds on Clipsal Airflow Ceiling Sweep Fan, results may vary on different brad AC fans. I would recommend experimenting with the capacitance values using the capacitance values that came with the fans original controller as a guide.